How to Move Azure resources between two different accounts
How to Move Azure resources between two different accounts
In-order to start the resources movement between accounts, as the first step, link the target subscription to the destination tenant. The source and destination subscriptions must exist within the same Azure Active Directory tenant to support the resource movement.
Understand the impact of transferring a subscription: Understand the impact of transferring a subscription
Checklist before moving resources: Checklist to move resource group and subscription
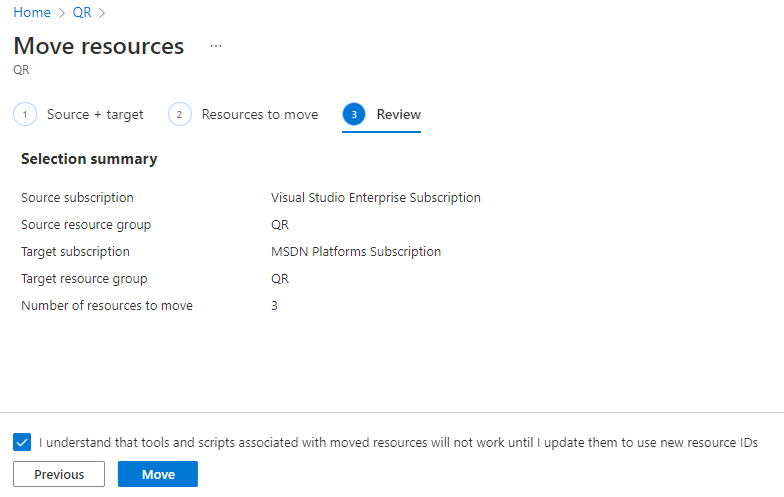
Once you are ready with all the above information, you can start the actual movement like an example I have shown below: Here, I am moving my resource group and and a functional app deployed under the resource group to a different subscription linked to my account. The movement includes the resources – an app service plan, a functional app and a storage account
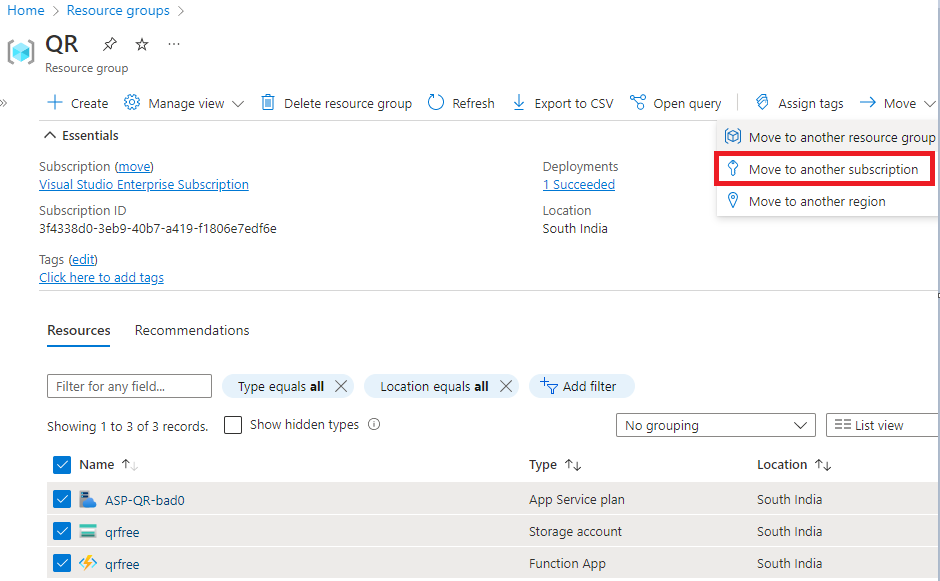
Go to the resource group blade and select the resource group. Select all the resources you wanted to move. Click Move menu and select Move to another subscription.
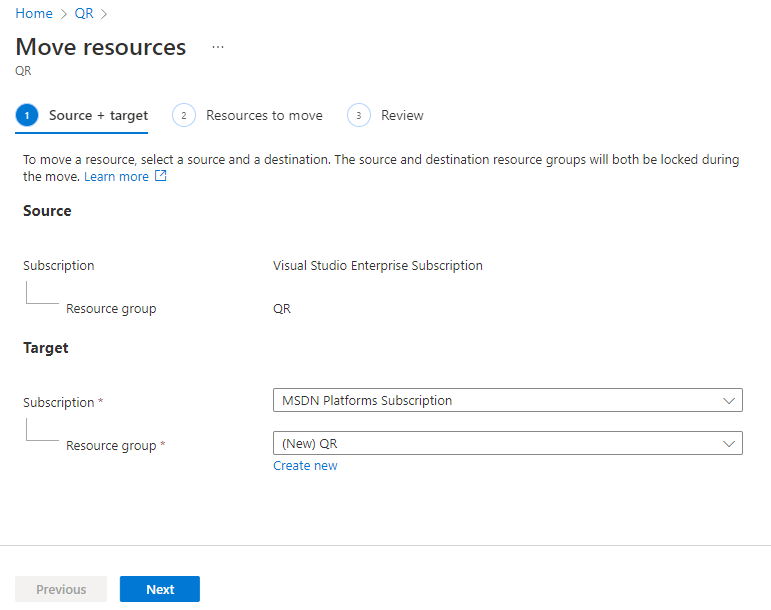
Select the target subscription as below and click Next:
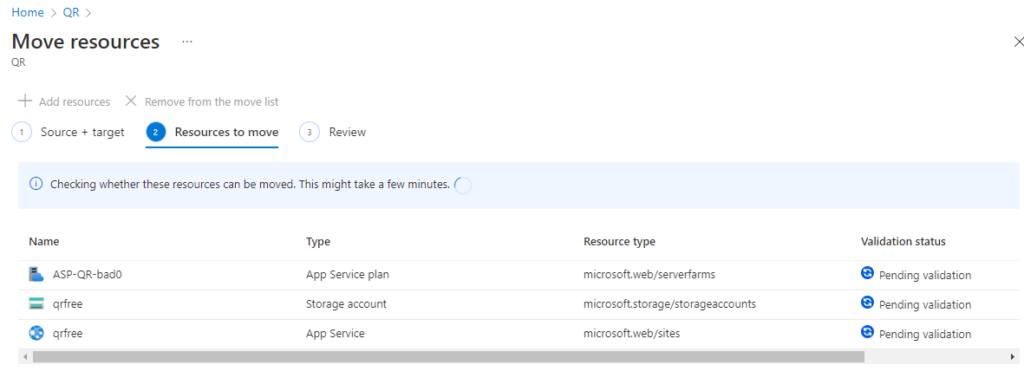
Validation runs are going to be executed for couple of minutes and wait until the validation is completed:
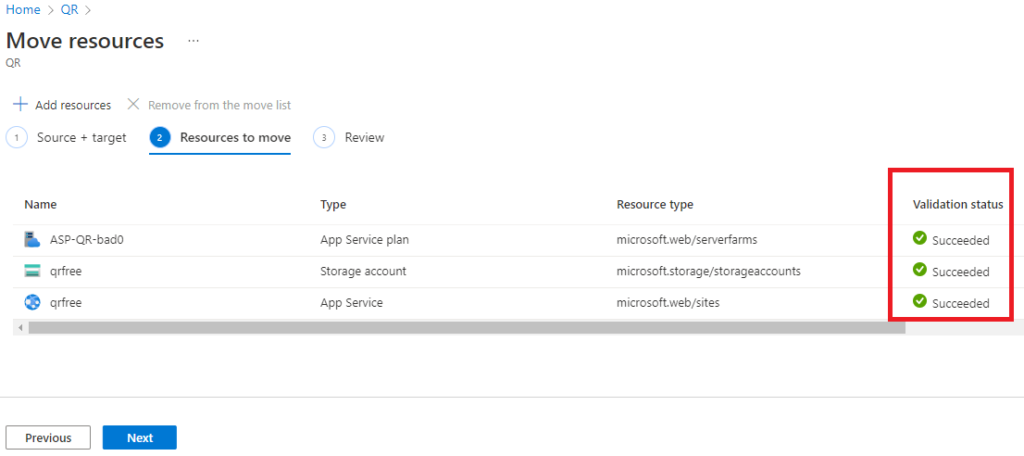
If the validation is successful, you will be intimated the status as below. Click next to continue to the review page:
Start the movement by clicking the move button
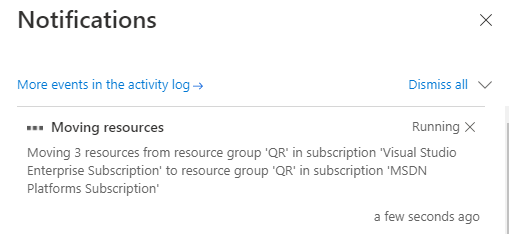
You will be notified the progress of the movement in the notification section as shown below:
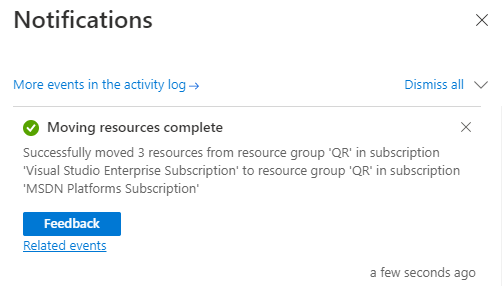
And finally, you will be notified the successful movement like shown below:
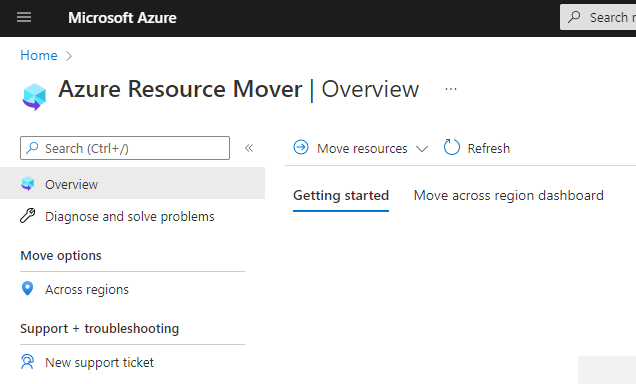
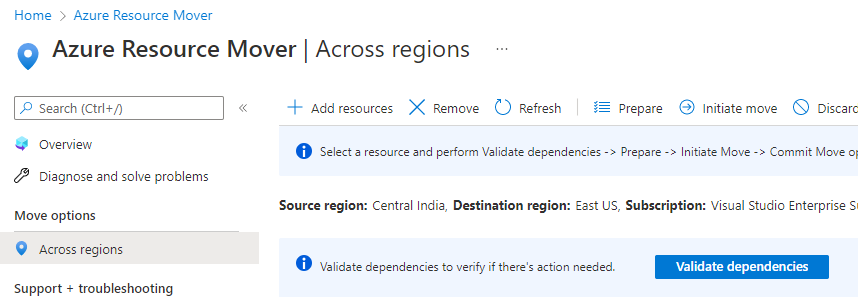
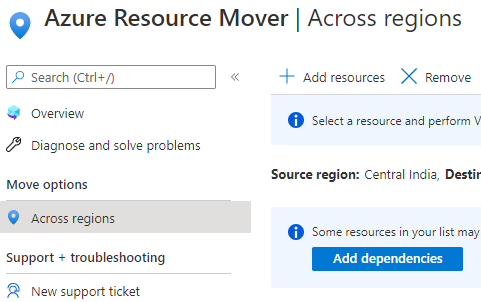
Note that Azure Resource mover is the dedicated section to handle the movement in a different approach.
If you come across certain issues in resolving the dependencies during the movement, through the following way, you will be intimated as below:
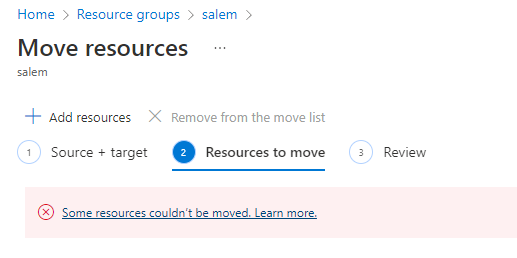
Click the message to understand the details and to resolve it.
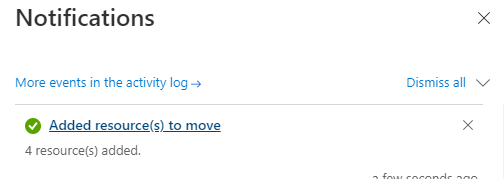
Some of the dependencies can be resolved in Azure Resource mover section as indicated here. The resources will be added to move and further dependencies can be resolved from Azure Resource mover blade. Check the notification section and find the dependencies as below:

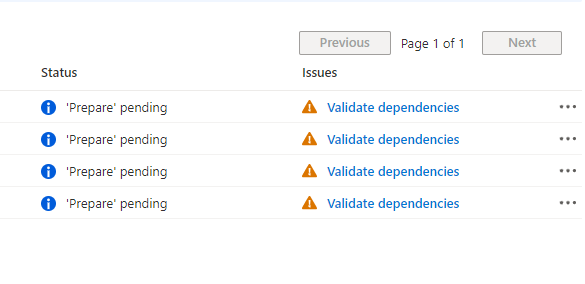
Validate dependencies of all resources by clicking the button. Or you may validate individual resources dependencies. You have to add the dependent resources by clicking the ‘Add Dependencies’ button as below:
After resolving all the dependencies issues, you will be able to move the resources successfully from the Azure Resource mover page itself by clicking the ‘Initiate Move‘ Button
